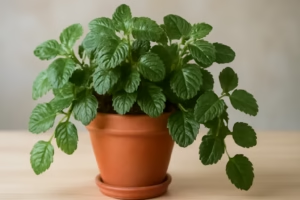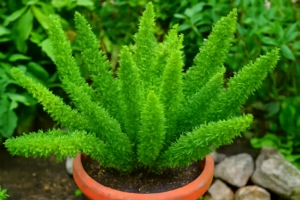
Peacock plants, also known as calatheas, are prized for their vibrant foliage and unique patterns. With proper care, these tropical beauties can thrive indoors or in sheltered outdoor environments. In this comprehensive guide, we’ll explore everything you need to know about growing and caring for peacock plants.
Care
Peacock plants require specific care to thrive and maintain their vibrant appearance.
Light:
Peacock plants prefer bright, indirect light. Place them near a window where they can receive plenty of natural light, but avoid direct sunlight, as it can scorch their delicate leaves. If your plant is exposed to too much sunlight, you may notice leaf burn or fading colors. In lower light conditions, such as those found in offices or north-facing rooms, consider supplementing with artificial grow lights to provide adequate light for your plant.
Watering:
Proper watering is crucial for peacock plants. Keep the soil consistently moist, but not waterlogged. Water thoroughly when the top inch of soil feels dry to the touch, ensuring that excess water drains out of the bottom of the pot. Avoid letting the soil dry out completely, as this can lead to leaf curling and browning. However, overwatering can cause root rot and other issues, so it’s essential to find the right balance. Use room-temperature water, and avoid using water that is high in salts or chlorine, as this can damage the plant’s roots.
- Moist Soil: Keep the soil consistently moist, but not soggy. Allow the top inch of soil to dry out between waterings.
- Filtered Water: Use room-temperature, filtered water to prevent mineral buildup on the leaves.
- Humidity: Maintain high humidity levels by misting the leaves regularly or placing the plant on a pebble tray filled with water.
Temperature:
Maintain a consistent temperature for your peacock plant, ideally between 65°F and 80°F (18°C to 27°C). Avoid exposing your plant to cold drafts or sudden temperature fluctuations, as this can stress the plant and lead to leaf damage. If the temperature drops below 60°F (15°C), your plant may suffer, so be sure to protect it from chilly conditions, especially during the winter months.
- Warmth: Keep peacock plants in a warm environment with temperatures between 65°F and 80°F (18°C to 27°C).
- Avoid Drafts: Protect them from cold drafts, which can cause leaf damage.
Soil:
Use a well-draining potting mix that retains moisture without becoming waterlogged. A mix containing peat moss or coco coir works well for peacock plants. Ensure that the pot has drainage holes to allow excess water to escape, preventing root rot. Repot your plant every year or two to refresh the soil and provide it with fresh nutrients.
- Well-Draining: Plant in well-draining soil to prevent waterlogging, which can lead to root rot.
- Peat Moss: Use a potting mix rich in peat moss to retain moisture.
Fertilizing:
During the growing season in spring and summer, feed your peacock plant with a balanced, water-soluble fertilizer diluted to half strength every 4-6 weeks. Reduce fertilization in the fall and winter when the plant’s growth slows. Overfertilizing can cause salt buildup in the soil, leading to root damage, so it’s essential to follow the recommended dosage.
- Diluted Fertilizer: Feed with a balanced, water-soluble fertilizer diluted to half strength every 4-6 weeks during the growing season (spring and summer).
- Reduce in Winter: Reduce fertilization in winter when growth slows.
Types
Peacock plants, also known as calatheas, come in several captivating varieties, each with its own unique foliage patterns and colors. Here are some popular types of peacock plants:
Calathea Ornata (Pin-Stripe Calathea):
Calathea ornata is prized for its striking dark green leaves adorned with pink stripes, resembling delicate brush strokes. The contrasting colors create a stunning visual effect, making it a favorite among houseplant enthusiasts. This variety prefers high humidity and indirect light, making it an excellent choice for bathrooms or well-lit living spaces.
Calathea Medallion:
Calathea medallion features large, round leaves with intricate patterns of green, white, and purple. The bold, symmetrical design of its foliage resembles a medallion, giving rise to its name. This variety is known for its striking appearance and prefers bright, indirect light to maintain its vibrant colors. It thrives in humid environments, making it an ideal choice for terrariums or rooms with high humidity levels.
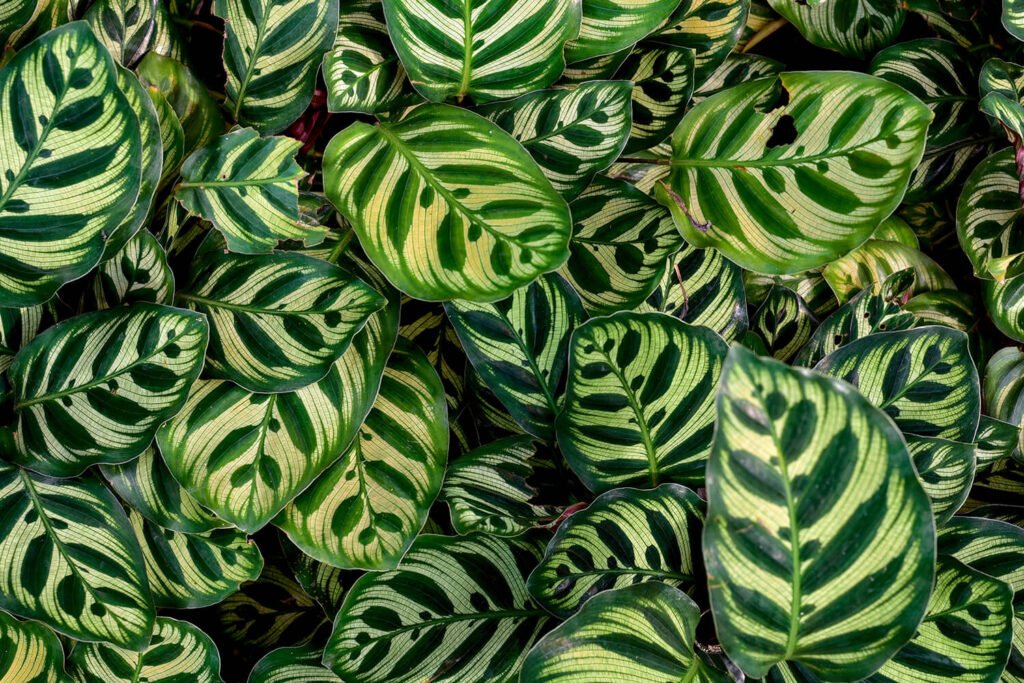
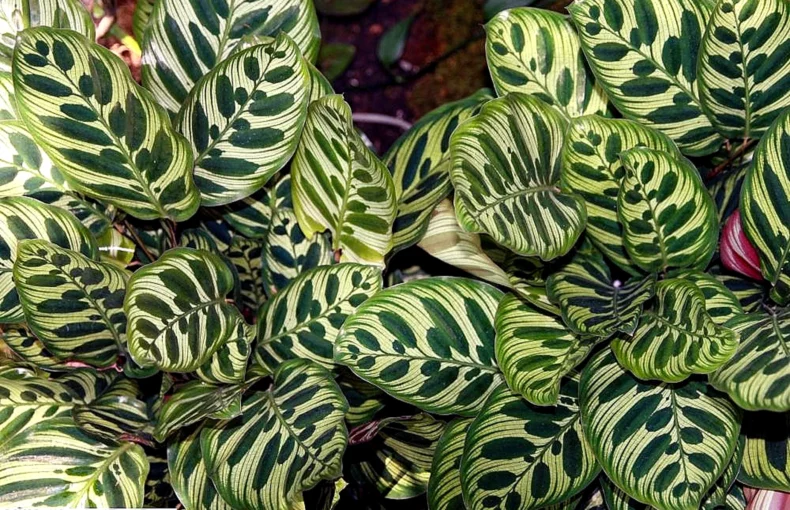
Calathea Makoyana (Peacock Plant):
Calathea makoyana, commonly known as the peacock plant, boasts light green leaves with dark green markings and a distinctive purple underside. The intricate patterns on its foliage resemble the eyespots on a peacock’s tail feathers, giving it its name. This variety is prized for its unique appearance and prefers medium to low light conditions. It thrives in high humidity and makes an excellent addition to bathrooms or shaded areas of the home.
Calathea Roseopicta (Rose-Painted Calathea):
Calathea roseopicta is known for its stunning foliage featuring shades of green, pink, and burgundy. The leaves have intricate patterns reminiscent of brushstrokes or watercolor paintings, giving them a distinctly artistic look. This variety prefers bright, indirect light and high humidity levels to maintain its vibrant colors. It is a popular choice for adding a touch of color and elegance to indoor spaces.
Calathea Lancifolia (Rattlesnake Plant):
Calathea lancifolia, also known as the rattlesnake plant, is characterized by its elongated, lance-shaped leaves with dark green stripes and purplish undersides. The unique patterning on its foliage resembles the skin of a rattlesnake, hence its name. This variety prefers moderate to bright, indirect light and high humidity levels. It is a favorite among plant enthusiasts for its striking appearance and easy-care nature.
Calathea Zebrina (Zebra Plant):
Calathea zebrina features elongated leaves with bold, zebra-like stripes in shades of green and dark purple. The striking contrast between the stripes and the leaf coloration gives this variety a bold and eye-catching appearance. Calathea zebrina prefers bright, indirect light and high humidity levels to thrive. It is an excellent choice for adding a touch of drama to any indoor space.
Calathea Orbifolia:
Calathea orbifolia is admired for its large, round leaves with silver-green stripes and a velvety texture. The elegant foliage of this variety adds a touch of sophistication to any room. Calathea orbifolia prefers bright, indirect light and high humidity levels. It is an ideal choice for creating a tropical oasis indoors.
Calathea Rufibarba (Velvet Calathea):
Calathea rufibarba, also known as the velvet calathea, is distinguished by its long, lance-shaped leaves with a velvety texture and deep green coloration. The undersides of the leaves feature striking reddish-purple hues. This variety prefers low to medium light conditions and high humidity levels. It is prized for its unique foliage and adds a touch of elegance to any indoor space.
Each type of peacock plant offers its own unique charm and beauty, making them popular choices for indoor plant enthusiasts. Whether you prefer bold, vibrant colors or subtle, intricate patterns, there’s a peacock plant variety to suit every taste and style.
Pruning
Regular pruning helps keep your peacock plant healthy and encourages new growth. Remove any yellowing or browning leaves with clean scissors or pruning shears. Trim leggy stems to promote a bushier, more compact growth habit. You can also remove spent flowers to redirect the plant’s energy into leaf production.
- Remove Brown Leaves: Trim brown or yellow leaves at the base of the stem using sharp, clean scissors.
- Trim Leggy Growth: Prune back leggy stems to encourage bushier growth.
- Deadhead Flowers: Remove spent flowers to redirect energy back into leaf growth.
Propagating
Propagating peacock plants, also known as calatheas, allows you to create new plants from existing ones, ensuring you always have beautiful foliage to enjoy. There are two main methods for propagating peacock plants: division and stem cuttings.
Division:
Division is the simplest and most common method for propagating peacock plants.
- Select a Healthy Plant: Choose a mature, healthy peacock plant with multiple stems or “clumps” of growth.
- Prepare the Plant: Carefully remove the plant from its pot and gently shake off excess soil to expose the roots.
- Divide the Plant: Using a sharp, clean knife or garden shears, carefully divide the plant into smaller sections. Each section should have its own set of roots and several stems or leaves.
- Plant the Divisions: Plant each division in its own pot filled with well-draining potting mix. Ensure that the soil is evenly moist and that the divisions are planted at the same depth as they were in the original pot.
- Care for the New Plants: Place the newly potted divisions in a warm, humid environment with bright, indirect light. Keep the soil consistently moist but not waterlogged, and mist the leaves regularly to maintain high humidity levels.
- Monitor Growth: Over the next few weeks, monitor the new plants for signs of growth. Once they have established roots and begun producing new leaves, you can treat them like mature peacock plants.
Stem Cuttings:
Stem cuttings are another effective way to propagate peacock plants, especially if you want to create multiple plants from a single parent plant.
- Select a Healthy Stem: Choose a healthy, mature stem from the parent plant. Look for a stem that is free from damage or disease and has several leaves attached.
- Take the Cutting: Use sharp scissors or pruning shears to take a 4-6 inch cutting from the stem, just below a leaf node. Remove any lower leaves from the cutting, leaving only a few leaves at the top.
- Prepare the Cutting: Dip the cut end of the stem in rooting hormone powder to encourage root growth.
- Plant the Cutting: Plant the cutting in a small pot filled with moist potting mix. Make a hole in the soil with a pencil or stick, then insert the cutting and gently press the soil around it to hold it in place.
- Provide Proper Conditions: Place the pot in a warm, humid environment with bright, indirect light. Cover the pot with a clear plastic bag or dome to create a mini greenhouse and retain moisture. Alternatively, you can place the pot in a propagation tray with a clear lid.
- Monitor Growth: Check the cutting regularly for signs of new growth. Once roots have formed and new leaves begin to emerge, you can remove the plastic covering and treat the new plant like a mature peacock plant.
Growing From Seeds
While propagating peacock plants from seeds is possible, it’s more challenging than other methods like division or stem cuttings. However, if you’re up for the challenge, here’s how you can grow peacock plants from seeds:
Seed Collection:
- Harvesting Seeds: Wait until your peacock plant has finished flowering. The flowers will produce seed pods containing the plant’s seeds. Allow the seed pods to mature and dry out on the plant.
- Collecting Seeds: When the seed pods are dry and beginning to crack open, carefully remove them from the plant. Open the pods and collect the small, dark seeds inside.
Sowing Seeds:
- Preparing the Soil: Fill a shallow tray or seedling tray with moist, well-draining potting mix. Peat-based mixes work well for germinating peacock plant seeds.
- Sowing Seeds: Sprinkle the peacock plant seeds evenly over the surface of the soil. Press them lightly into the soil, but do not cover them completely, as peacock plant seeds require light to germinate.
- Covering Seeds: To help retain moisture, cover the tray with a clear plastic lid or place it in a clear plastic bag. This creates a mini greenhouse environment for the seeds.
- Maintaining Moisture: Keep the soil consistently moist but not waterlogged. Check the tray regularly and mist the soil if it starts to dry out. Avoid letting the soil dry out completely, as this can hinder germination.
Germination:
- Warmth and Light: Place the tray in a warm location with bright, indirect light. Peacock plant seeds require warmth and light to germinate, so placing them near a window or under grow lights is ideal.
- Patience: Germination can take anywhere from 2 to 4 weeks, so be patient and continue to monitor the tray regularly. Keep the lid or plastic covering on until the seeds have sprouted.
Transplanting Seedlings:
- Seedling Development: Once the seedlings have developed their first set of true leaves, they can be transplanted into individual pots.
- Potting Up: Carefully remove the seedlings from the tray and transplant them into small pots filled with well-draining potting mix. Handle the seedlings gently to avoid damaging their delicate roots.
- Growing Conditions: Place the pots in a warm, humid environment with bright, indirect light. Keep the soil consistently moist, but be careful not to overwater, as this can cause root rot.
Care and Maintenance:
- Watering: Continue to water the seedlings regularly, ensuring that the soil remains moist but not waterlogged.
- Fertilizing: After the seedlings have been growing for a few weeks, you can begin fertilizing them with a diluted, balanced fertilizer to promote healthy growth.
- Transplanting: As the seedlings grow larger, they may need to be transplanted into larger pots to accommodate their growing root systems.
Patience and Persistence:
Growing peacock plants from seeds requires patience and persistence, as it can be a slow and challenging process. However, with the right care and attention, you can successfully grow beautiful peacock plants from seeds and enjoy their stunning foliage for years to come.
Growing in Pots
Growing peacock plants in pots is a popular choice for indoor gardeners, allowing you to enjoy these beautiful plants even if you have limited outdoor space. Here’s how to grow peacock plants successfully in pots:
Selecting a Pot:
- Size: Choose a pot that is slightly larger than the plant’s root ball. A pot that is too large can hold excess moisture, leading to root rot, while a pot that is too small can restrict root growth.
- Drainage: Ensure the pot has drainage holes at the bottom to allow excess water to escape. Proper drainage is crucial for preventing waterlogged soil, which can cause root rot.
Potting Mix:
- Well-Draining Mix: Use a well-draining potting mix specifically formulated for indoor plants. Peacock plants prefer soil that retains moisture without becoming waterlogged.
- Peat Moss or Coco Coir: Look for a mix that contains ingredients like peat moss or coco coir, which help retain moisture while providing aeration for the roots.
Planting:
- Preparing the Pot: Fill the bottom of the pot with a layer of small stones or broken pottery to improve drainage.
- Adding Soil: Fill the pot halfway with potting mix, then remove the peacock plant from its nursery pot and place it in the center of the pot.
- Filling Around the Plant: Fill in the gaps around the plant with additional potting mix, pressing gently to secure the plant in place. Leave about an inch of space between the soil surface and the rim of the pot to allow for watering.
Placement:
- Light: Choose a location with bright, indirect light for your peacock plant. Avoid placing it in direct sunlight, as this can scorch the leaves.
- Temperature: Peacock plants prefer temperatures between 65°F and 80°F (18°C to 27°C). Avoid exposing them to cold drafts or sudden temperature fluctuations.
Watering:
- Consistent Moisture: Keep the soil consistently moist, but not waterlogged. Water the plant thoroughly when the top inch of soil feels dry to the touch, allowing excess water to drain out of the bottom of the pot.
- Avoid Overwatering: Be cautious not to overwater, as peacock plants are susceptible to root rot. Empty the saucer under the pot after watering to prevent the plant from sitting in standing water.
Humidity:
- Misting: Peacock plants thrive in high humidity environments. Increase humidity around the plant by misting the leaves regularly with room-temperature water.
- Humidity Tray: Place the pot on a tray filled with pebbles and water to create a humid microclimate around the plant. As the water evaporates, it will increase the humidity level.
Fertilizing:
- During Growing Season: Feed your peacock plant with a balanced, water-soluble fertilizer diluted to half strength every 4-6 weeks during the growing season (spring and summer).
- Reduce in Winter: Reduce fertilization in the winter when the plant’s growth slows.
Pruning:
- Remove Dead Leaves: Trim away any dead or yellowing leaves as they appear. This not only keeps the plant looking tidy but also promotes new growth.
- Shape and Maintenance: Prune back leggy stems to encourage bushier growth and remove any spent flowers to redirect energy back into leaf production.
Repotting:
- Every 1-2 Years: Repot your peacock plant every 1-2 years, preferably in the spring, to refresh the soil and provide it with fresh nutrients.
- Check Roots: Check the roots when repotting and trim any circling or tangled roots to encourage healthy growth.
Protection from Pests:
- Monitor for Pests: Keep an eye out for common pests like spider mites, mealybugs, and aphids. If you notice any signs of pest infestation, treat the plant with insecticidal soap or neem oil.
- Regular Cleaning: Wipe the leaves of the plant regularly with a damp cloth to remove dust and prevent pest buildup.
Overwintering
Peacock plants are sensitive to cold and may require special care during winter.
- Indoors: Bring outdoor plants indoors before the first frost.
- Warmth: Keep indoor temperatures consistent and above 60°F (15°C).
- Humidity: Maintain high humidity levels to prevent leaf browning.
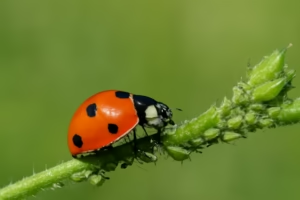
Common Pests
Peacock plants are relatively resistant to pests and diseases, but they can still encounter issues from time to time. Keep an eye out for common pests such as spider mites, aphids, and mealybugs. If you notice any signs of pest infestation, treat your plant with insecticidal soap or neem oil. Additionally, watch for symptoms of root rot, such as yellowing leaves and wilting, and adjust your watering habits accordingly.
Spider Mites:
- Symptoms: Fine webbing on leaves, stippled leaves.
- Treatment: Rinse leaves with water or apply neem oil.
Mealybugs:
- Symptoms: White, cottony clusters on stems and leaves.
- Treatment: Remove with a cotton swab dipped in rubbing alcohol.
Common Issues
Peacock plants may suffer from a few common issues if their care requirements are not met.
Leaf Curling:
- Cause: Low humidity, overwatering, or underwatering.
- Solution: Adjust watering and humidity levels, and mist leaves regularly.
Brown Leaf Tips:
- Cause: Dry air, underwatering, or excessive fertilizer.
- Solution: Increase humidity, adjust watering, and reduce fertilizer.
Yellowing Leaves:
- Cause: Overwatering, underwatering, or poor drainage.
- Solution: Adjust watering frequency and ensure proper drainage.
FAQs (Frequently Asked Questions)
Are peacock plants toxic to pets?
Yes, peacock plants are toxic to cats, dogs, and other pets if ingested. Keep them out of reach of curious pets.
Can I keep peacock plants outdoors?
Peacock plants can be grown outdoors in tropical or subtropical climates with warm temperatures and high humidity.
Why are the leaves of my peacock plant losing their color?
Loss of leaf color in peacock plants can be caused by insufficient light or low humidity. Move the plant to a brighter location and increase humidity levels to restore color.